I haven't posted for a few weeks, but I've been flat out on the Land Rover, just haven't found time to do an update.
Things I've done since my last post:
Fitted new rear cross member. This was a pain in the backside to say the least. Before cutting off the old x-member I made a jig, that sat flat across the top surface of the x-member and picked up on the holes that secure the body. Fast forward a month or so and I'm bolting the new x-member to the jig and the distance from the top surface of the x-member to the holes is different to the old x-member, and therefore the jig. I guess you can't expect much better from Britpart. so after much deliberation I decided to use the jig to determine the distance, height and squareness of the x-member, but didn't pick up the holes. I will elongate the holes in the tub to suit, when the time comes to refit. I did throw the tub on to check alignment, and the holes are within 'half a hole' so it should work.
I then gave the whole chassis another coat of paint. I still need to spray some kind of rust inhibitor inside. I'm considering spraying chain bar oil inside to keep the rust away.
In the background I've also been chipping away at finishing my axles. My rear axle was pretty much done, Just needed to set the bearing end float. Using a DTI, I set them to 0.06 to 0.10 mm end float. Finished the assembly with new drive flanges, felt seals, split pins and end caps. I've fitted the brake backing plates but will fit new brake components later on.
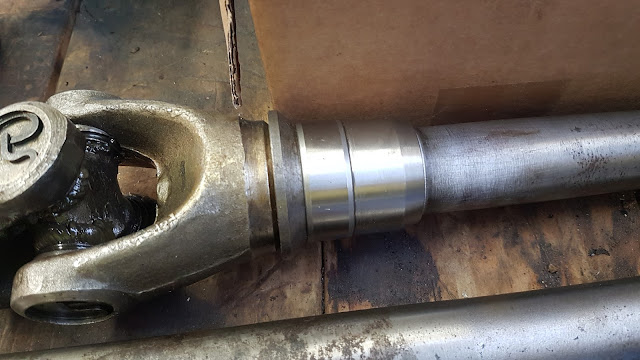
Front axle was a pretty big job. I overhauled the swivel hubs with new bearings, railko bushing and seals. My swivel balls have been re-chromed at some stage, so I am re using them. I bought a kit that came with The railko bushes and upper pins, the taper roller bearing and all the shims. It was an axle set so enough for both sides, and was reasonable quality despite being Britpart.
Assembly was pretty straight forward, I lubricated the bush and bearing with oil, then set the bearing pre-load (drag) as per the green book of words (3.6 to 4.5 kg) Fitted everything up with new seals and gaskets. Hopefully it'll stay leak free for a while. Half-shafts UJ's felt good so I've left them be, I replaced the distance piece, bearing race etc though. The tapered spacer that goes on after the race came out of the packet undersized, luckily I have access to a lathe so was able to bore them out by 0.1mm. This gave a total interference of 0.01mm, so after heating it with the induction heater it dropped straight on.
My latest order from LRdirect.com arrived a few days ago, which consisted of all the bushes, shackles, shackle pins, etc to fit the axles to the chassis. As well as two shiny Genuine Land Rover brake pipe plates (only because no one else makes them!) Britpart gets a bad rep but most of what I've bought so far has been reasonable, and if I bought everything genuine this project wouldnt be happening. I can't recommend LRdirect enough. Delivered to my door from the UK within 5 days, unreal service.
Lastly, I've fitted my spring and chassis bushes (using the tool I made to remove them initially) and I've hung the rear axle under the chassis, it all went fairly smoothly as all the parts were new. I coated the bolts in Kluber assembly paste so all going well I won't need the angle grinder next time I need to remove the springs. All the shackle pins have been left loose, I'll tighten them when the full weight of the Land Rover is on the springs.
Sorry for the long post, That's what happens when I get behind in posting!
Follow my progress as I rebuild a 1973 Land-Rover Series III. It needs a lot of work, with all the major assemblies needing an overhaul, and a complete bulkhead swap. My aim is to keep it as original as possible and keep costs down by doing most of the work myself. Feel free to comment with any feedback or suggestions!
Subscribe to:
Post Comments (Atom)
Long overdue update
It's been over a year since I posted here so I thought i should bring the blog up to date, incase anyone out there actually reads it! ...

-
My apologies for not getting this post done earlier, I actually finished the gearbox about a month ago but havent found time to work on the ...
-
You may remember from a previous post that I had made a frankenstein bulkhead but transplanting the centre panel from my rusty bulkhead into...


Awesome work Ben, would be keen to see it
ReplyDeleteFab
Great work Ben, I am going to follow how you get on as you are ahead of me and my S2a 1962 88. I will be doing a new chassis build and hope to start a blog as I progress, but estimate a 2 year build.
ReplyDelete